Introduction: This Page Is the Litter Box Checklist (Not the Full Causes Guide)
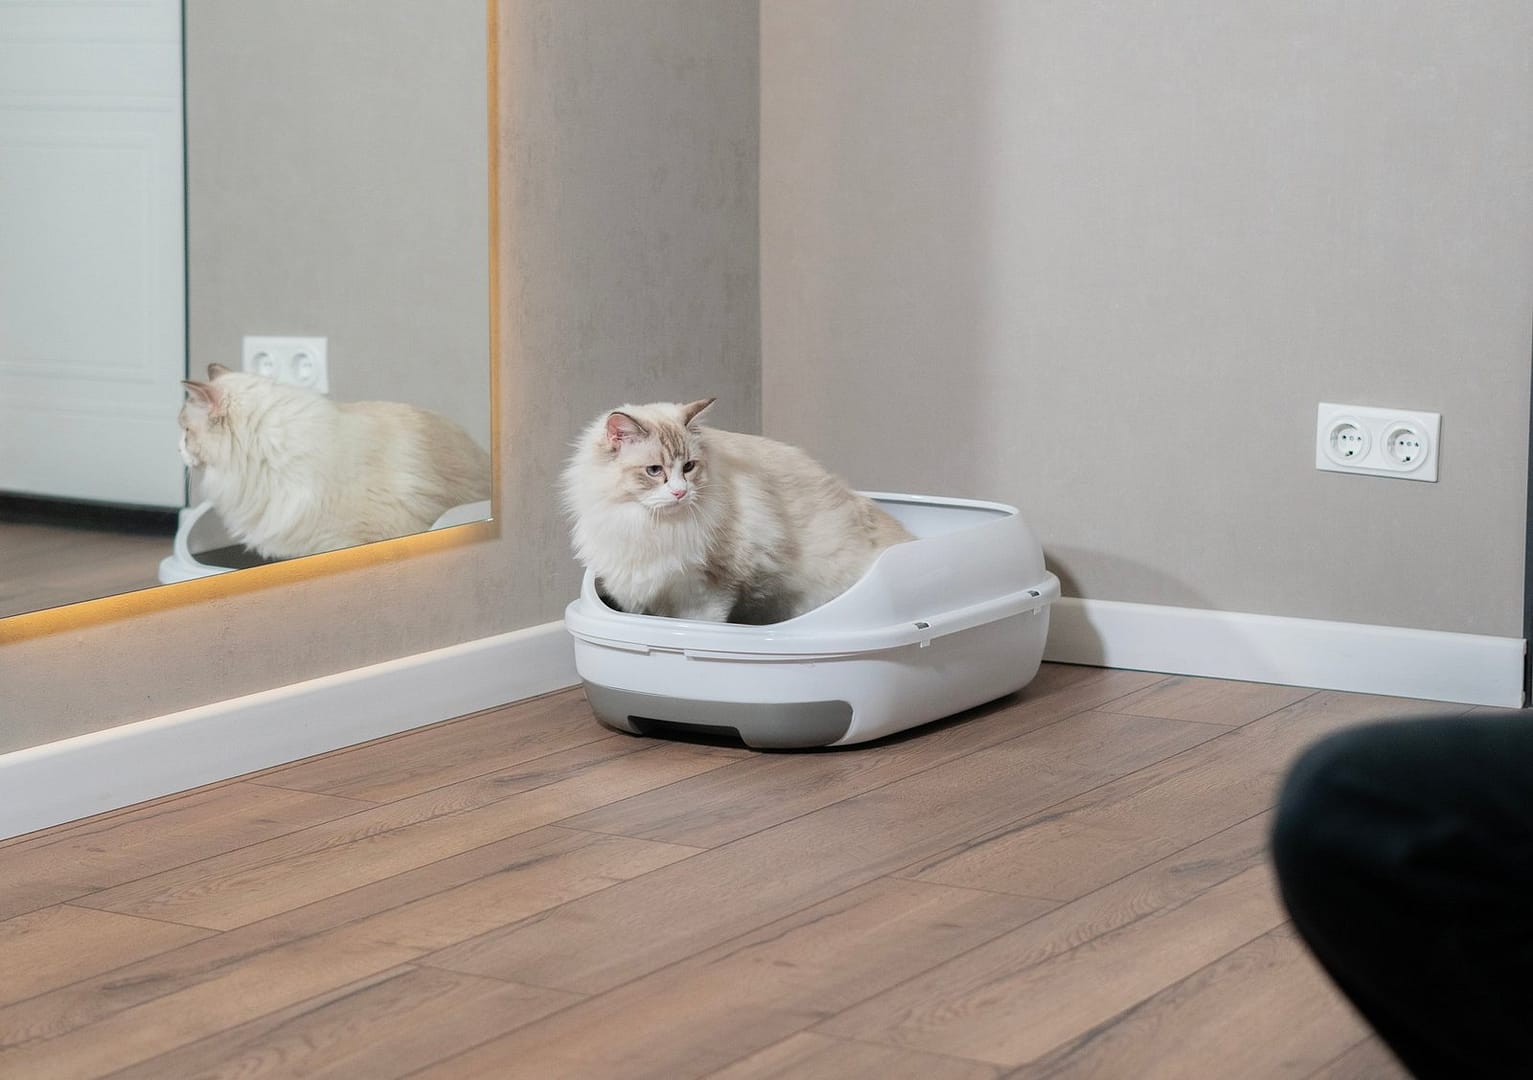
If your cat is peeing on the bed and you’ve already ruled out urgent medical issues, the next place to look is often surprisingly simple: the litter box setup.
This page is a step-by-step checklist to fix the most common litter box problems that make cats avoid the box and choose soft bedding instead—things like box number, location, size, cleanliness, litter texture, and household access.
Important: If your cat is straining to urinate, crying in the box, producing very little urine, or you see blood, treat it as urgent and contact a vet right away.
Quick Litter Box Checklist (Start Here)
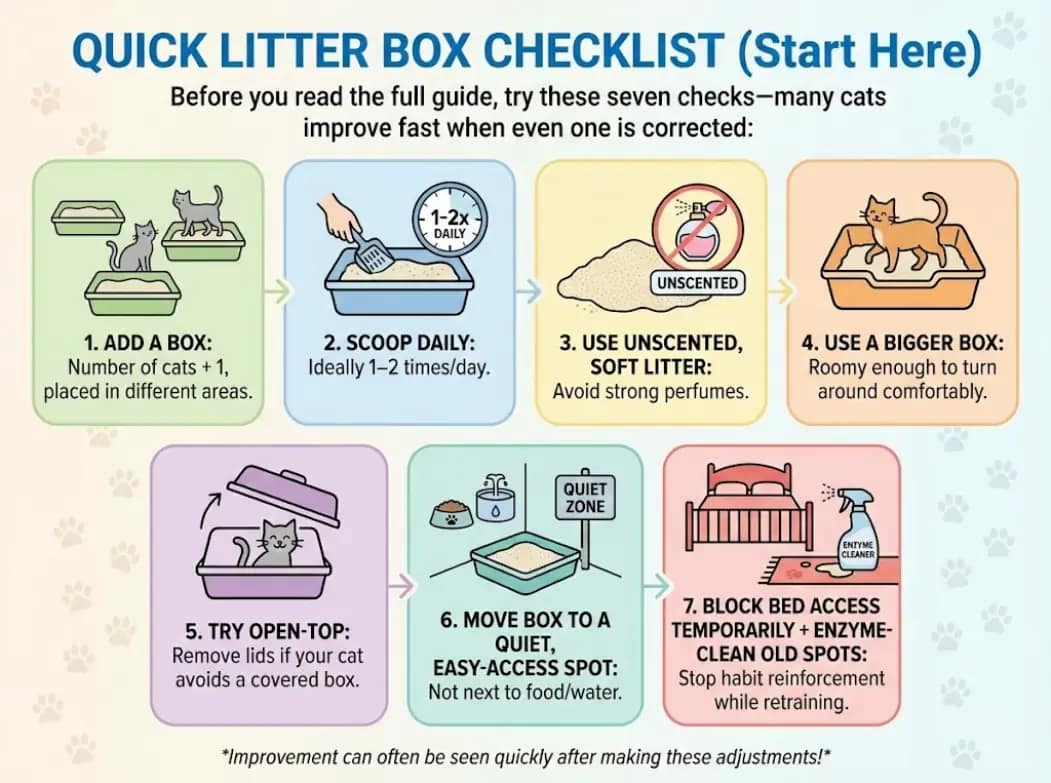
Before you read the full guide, try these seven checks—many cats improve fast when even one is corrected:
Add a box: number of cats + 1, placed in different areas
Scoop daily: ideally 1–2 times/day
Use unscented, soft litter: avoid strong perfumes
Use a bigger box: roomy enough to turn around comfortably
Try open-top: remove lids if your cat avoids a covered box
Move box to a quiet, easy-access spot: not next to food/water
Block bed access temporarily + enzyme-clean old spots: stop habit reinforcement while retraining
If you want the full breakdown of medical, stress, and behavioral causes (and how to handle them), read this first:
Why Is My Cat Peeing on Bed? Causes & Proven Fixes
If you’re specifically troubleshooting the litter box setup, keep going—next we’ll identify which litter box mistake fits your situation, then walk through the exact fixes.
Find Your Situation Fast (Choose What Matches)
If your cat is peeing on the bed, the “why” is usually one of these common litter-box patterns. Pick the one that sounds like your cat and jump to the fix:
They still use the litter box sometimes, but also pee on the bed
It happens mostly at night
It started right after you changed litter or the box
It only happens in a multi-cat home (or when another pet is around)
They avoid a covered box / seem nervous in the litter area
They’re older, stiff, or struggle to climb into the box
They only pee on soft things (bed, laundry, rugs)
Important: If your cat is straining, crying, producing little/no urine, or has blood, treat it as urgent and contact a vet. (Especially male cats—blockages can be emergencies.)
When the Bathroom Isn’t Up to Standard: Litter Box Mistakes That Lead to Bed Accidents
If health issues have been ruled out, the fastest next step is to diagnose the litter box setup problem. Use the quick checks below to match your situation, then apply the 48-hour test fix.
How to use this section: Find the pattern that best matches your cat → do the “Try first” fix → track results for 2–7 days.
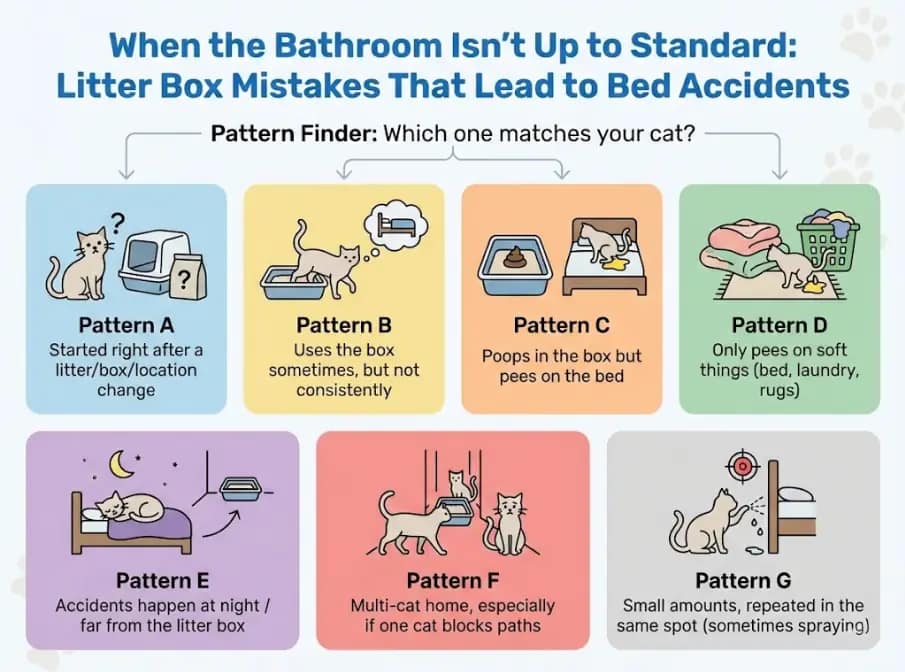
Pattern Finder: Which one matches your cat?
Pattern A — Started right after a litter/box/location change
Likely: litter texture/scent aversion or box style dislike
Try first (48 hours): revert to previous litter OR run a 2-box “litter buffet”
Pattern B — Uses the box sometimes, but not consistently
Likely: cleanliness threshold, box access, or occasional stress/competition
Try first: add one more box + scoop 2×/day for a week
Pattern C — Poops in the box but pees on the bed
Likely: urine-specific aversion (odor, size, pain association, privacy)
Try first: add a second box in a new quiet location + unscented litter
Pattern D — Only pees on soft things (bed, laundry, rugs)
Likely: texture preference (soft substrate)
Try first: offer one “soft” option (fine unscented litter or pad-lined box) as a transition tool
Pattern E — Accidents happen at night / far from the litter box
Likely: access and convenience (distance, stairs, dark hallway)
Try first: put a box closer to the bedroom + ensure easy entry
Pattern F — Multi-cat home, especially if one cat blocks paths
Likely: guarding/resource competition
Try first: distribute boxes in different zones + avoid “dead-end” placements
Pattern G — Small amounts, repeated in the same spot (sometimes spraying)
Likely: marking behavior (overlaps with environment/stress)
Try first: still upgrade box resources
Troubleshooting Table
| What you observe | Likely litter box problem | 48-hour test fix |
|---|---|---|
| Pees on bed/laundry, avoids litter | Texture preference (soft vs gritty) | Offer a second box with softer litter OR a box lined with an absorbent pad, then transition gradually |
| Uses box for poop but pees on bed | Box odor / cleanliness / urine aversion | Add a second box, scoop twice daily, and switch to unscented litter |
| Hovers near box but pees outside it | Box too small / painful entry | Upgrade to a larger, open box with a low entry |
| Only pees on bed at night | Access/location issue | Add a box near the bedroom, improve lighting, remove barriers (stairs/doors) |
| Multi-cat home + bed peeing | Resource guarding / conflict | Add boxes in separate zones so no cat can “own” them; spread resources |
| Started after moving the box/litter change | Negative association | Move box to a calmer location + revert to old litter + add one “backup” box |
What these patterns usually mean (quick explanations)
Box aversion: often caused by odor, box style, or negative association → try open, larger box + unscented litter.
Surface preference: soft bedding can feel “right” → offer a softer litter option as a bridge.
Too few boxes / inconvenient location: cat chooses the nearest comfortable spot → add a box where accidents happen.
Unpleasant conditions: strong cleaners, scented litter, noisy rooms → move box + remove scent triggers.
Marking overlap: repeated small deposits can be territorial → upgrade boxes, but see the full causes guide.
Most litter box-related bed peeing improves quickly once you match the right fix to the right setup problem. Start with the checklist below and change one variable at a time.
How to Fix Common Litter Box Issues (Step-by-Step Checklist)
If your cat is peeing on the bed, this checklist helps you fix the litter box setup in a structured way. Make one change at a time, keep notes, and test each step for 48–72 hours before moving on.
Important: If your cat is straining, crying in the box, producing tiny amounts of urine, or you see blood, contact a vet right away. (This checklist is for litter box/environment fixes after medical issues are ruled out.)
Step 1: Reset the Bed (Stop the “Habit Loop” First)
Why this matters: If the bed still smells like urine (even faintly), it can act like a “repeat here” cue.
Do this today:
Wash bedding thoroughly and use an enzyme-based cleaner on the mattress/affected areas.
Avoid ammonia-based cleaners (they can smell like urine to cats).
While you retrain, block access when you can’t supervise:
Close the bedroom door, or
Cover the bed with a plastic shower curtain/tarp (most cats dislike the feel).
If accidents happened multiple times, consider a washable waterproof mattress protector temporarily.
Pass check (48–72 hours):
Your cat shows fewer attempts to jump on the bed to pee, or stops revisiting the spot.
If not improving:
Keep bed blocked and continue to Step 2—your litter box setup likely needs changes.
Step 2: Add the Right Number of Litter Boxes (Cats + 1)
Why this matters: Not enough boxes = avoidance, competition, “I can’t get there in time,” or “I don’t want to share.”
Do this:
Use the formula: number of cats + one extra box.
1 cat → 2 boxes
2 cats → 3 boxes
Place boxes in separate zones so one cat can’t “guard” them.
In multi-story homes: add at least one box per floor.
Pass check (48–72 hours):
You see more frequent box use and fewer “searching” behaviors (pacing, sniffing bedding, circling).
If not improving:
Don’t remove boxes yet—continue to Step 3.
Step 3: Set a Cleanliness Baseline (Make the Box Impossible to Reject)
Why this matters: Many cats will choose a clean bed over a dirty box every time.
Do this:
Scoop at least once daily (twice is ideal).
Keep litter at a consistent depth (enough to dig and bury).
Fully dump/replace litter on a regular schedule (often weekly/biweekly depending on litter and cats).
Wash the box with mild, unscented soap and warm water.
Avoid strong chemical smells around the box area.
Pass check (48–72 hours):
Your cat enters the box more confidently and uses it more consistently.
If not improving:
Move to Step 4 (box size/design is often the real issue).
Step 4: Upgrade the Box Itself (Size + Open Design + Easy Entry)
Why this matters: A box that’s too small, too tall to enter, or too enclosed can cause avoidance—even if it’s clean.
Do this:
Choose a box large enough for your cat to turn around and squat comfortably.
For many adult cats, commercial boxes are too small—consider a large storage bin as a litter tray.
If you use a covered box, test an open box for a week.
For older cats/kittens: provide low-entry access (short sides or a cut entry).
Pass check (48–72 hours):
You see fewer hesitations (standing at the edge, leaving without using it).
Your cat spends a normal amount of time in the box (not rushing out).
If not improving:
Continue to Step 5 (location and “safety” are huge).
Step 5: Fix Box Location (Quiet, Easy Access, Safe Escape Route)
Why this matters: A scary or inconvenient location makes the bed feel safer.
Do this:
Put boxes in quiet, low-traffic areas, not next to loud appliances.
Avoid placing boxes beside food/water.
Don’t trap the box in a dead-end where your cat can be ambushed.
Make sure the box is easy to reach (especially at night):
Consider adding a nightlight near the route to the box.
In multi-cat homes: distribute boxes so one cat can’t block the only route.
Pass check (48–72 hours):
Your cat uses the box at normal times (including nighttime), and bed incidents decline.
If not improving:
Move to Step 6 (litter preference/aversion).
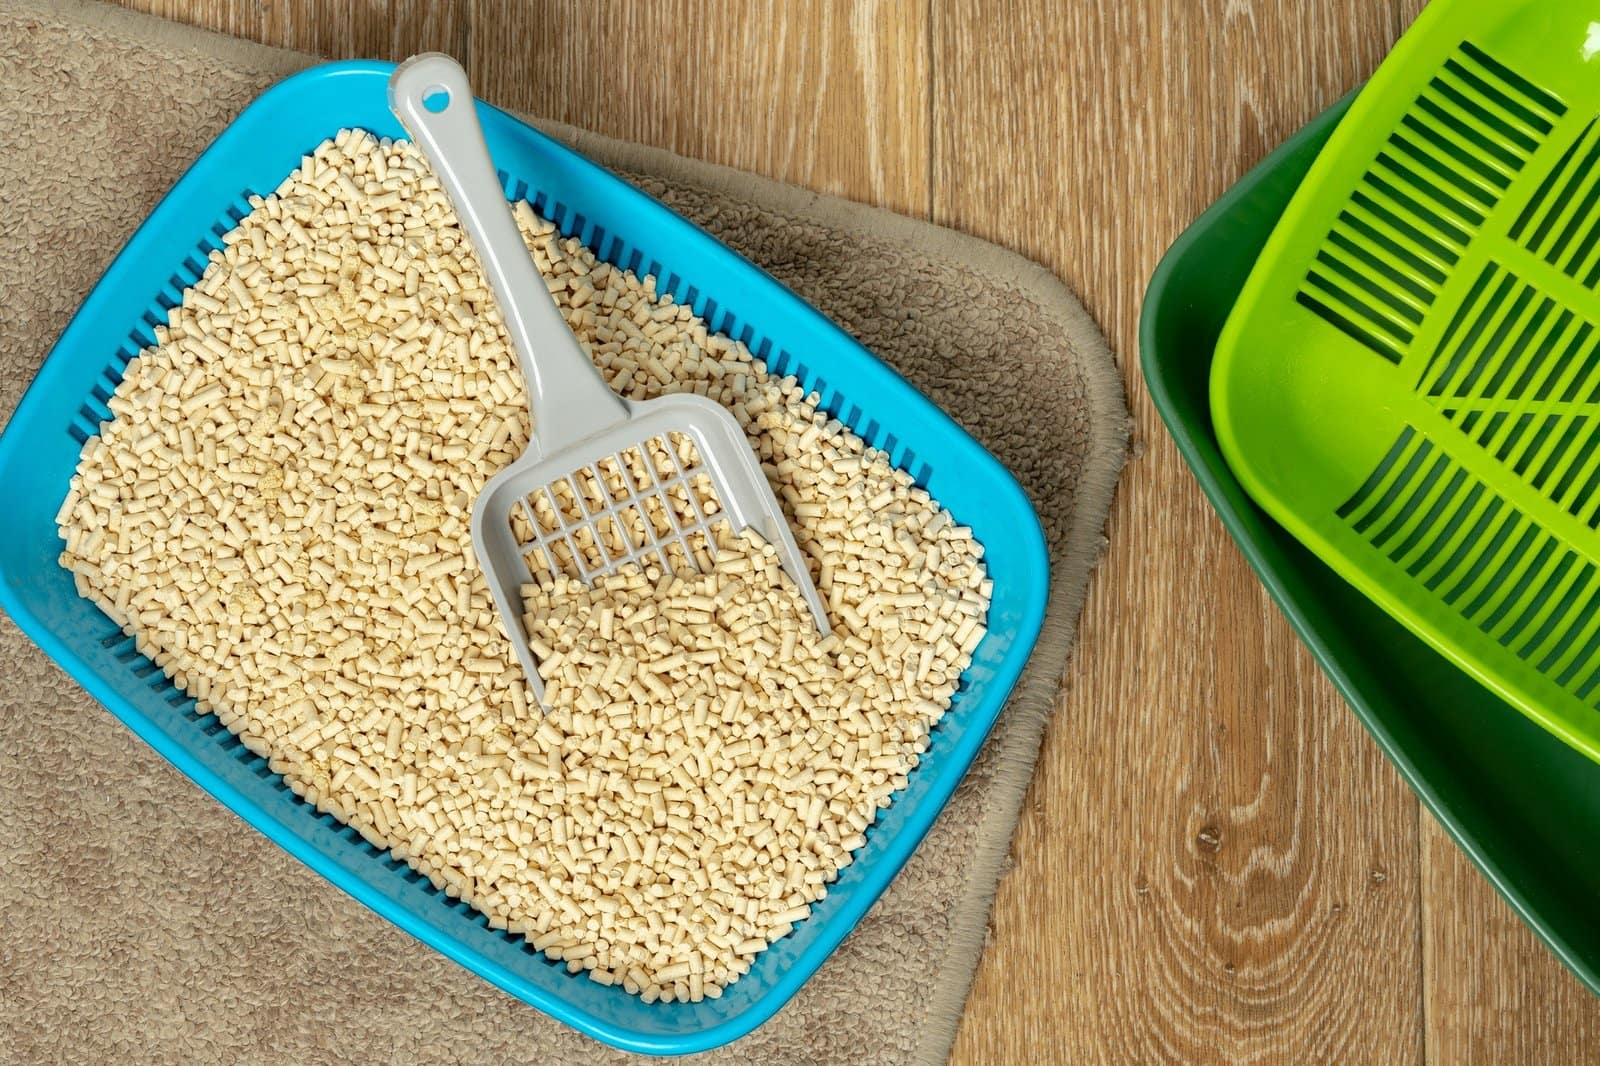
Step 6: Run a “Litter Buffet” (Find the Texture Your Cat Will Accept)
Why this matters: Cats can reject a litter for texture, dust, smell, or paw discomfort.
Do this:
Set up two boxes side by side with different litters for 3–5 days:
Box A: soft, unscented clumping litter
Box B: alternative texture (paper pellets, crystals, etc.)
Do not add scent boosters.
If accidents started after a litter change, revert to the previous litter immediately (if possible).
Pass check (48–72 hours):
Your cat shows a clear preference for one box/litter type.
If not improving:
Keep the preferred litter option and go to Step 7 (stress/negative associations).
Step 7: Remove Negative Associations (Make the Box a “Safe Zone”)
Why this matters: If something scary happened in/near the box, your cat may avoid it even if everything else is perfect.
Do this:
Prevent dogs/kids/other cats from interrupting litter box use.
If you have an automatic box, pause self-cleaning temporarily (or switch to a simple box) to test whether noise is the issue.
In multi-cat homes:
Add visual separation between boxes
Place boxes in multiple rooms
Ensure at least one box has two “escape routes” (open area, not cornered)
If a past painful episode happened in the box (like during a UTI), try a new box and/or new location to “reset” the association.
Pass check (3–7 days):
Your cat uses the box without scanning the room, rushing, or avoiding it.
If not improving:
Continue bed blocking and revisit Step 2–6—most persistent cases are still “box count + location + litter + safety,” not just one factor.

How to Use This Checklist Without Guessing
To avoid doing 10 changes at once (which makes troubleshooting impossible), use this rhythm:
Days 1–2: Step 1 + Step 2 (bed reset + enough boxes)
Days 3–4: Step 3 (cleanliness baseline)
Days 5–7: Step 4–5 (box design + location)
Week 2: Step 6–7 (litter buffet + safety/associations)
Once your cat is reliably using the box again for 2–3 weeks, you can gradually remove temporary bed restrictions.
Box Placement Map: Where to Put Litter Boxes So Cats Actually Use Them
Placement matters as much as cleanliness. A ‘perfect’ box in the wrong spot can still get ignored—especially in multi-cat homes or at night.
Use the rules below, then follow the layout examples to build your own placement map in 10 minutes.
Placement Rules (non-negotiables)
Rule 1: One box per zone (not one box per home).
If your cat has to cross the whole house—or climb stairs—to reach the box, accidents happen when urgency hits.
Rule 2: Avoid dead ends.
Cats don’t like feeling trapped. Don’t place boxes in tight closets or corners where another pet can block the exit.
Rule 3: Quiet + predictable beats hidden.
Pick a low-traffic spot where the cat won’t be startled. “Quiet” is good; “remote” is not.
Rule 4: Keep distance from food and water.
Don’t place boxes right next to feeding areas.
Rule 5: In multi-cat homes, spread boxes so one cat can’t ‘own’ them all.
Boxes should be in separate areas with different approaches—ideally out of direct line-of-sight.
Rule 6: Night access matters.
If bed accidents happen at night, add a box closer to the bedroom and consider a soft nightlight in the route.

The Box Placement Map (quick method)
Make your map in 10 minutes
Sketch your home layout (even a messy one). Mark bedrooms, feeding area, loud rooms (laundry/garage), and busy paths.
Mark your cat’s most common routes and hangout zones (sleeping spots matter).
Place boxes so each major zone has a nearby option (and at least one “escape route”).
In multi-cat homes, ensure boxes are not all in one cluster.
Test for 7 days and adjust one variable at a time.
Placement Mistakes That Cause Bed Peeing
| Mistake | Why cats avoid it | Better option |
|---|---|---|
| Box in laundry room | sudden noise/vibration | quiet hallway corner |
| Box in closet | trapped / dead-end | open area with two exits |
| Box next to food | instinctive aversion | different room/zone |
| All boxes together | easy to guard | separate zones + different approach paths |
| One box far away | urgency + access | one per floor / near sleep zone |
Tie it back to bed peeing (so it stays topical)
If the bed peeing happens at night:
Put a box closer to the bedroom zone
Keep a clear route
Consider a small nightlight
Temporarily close the bedroom door until the new placement becomes habit
Conclusion: You Can Stop Bed Peeing—By Fixing What Your Cat Is “Telling” You
When a cat pees on the bed, it’s almost never “bad behavior.” It’s usually a sign that something about their bathroom setup or environment isn’t working for them—and that’s often fixable.
Here’s the simplest plan to reset the habit:
Make the litter box irresistible: large enough, uncovered if needed, and filled with a soft, unscented litter.
Put it where your cat feels safe: quiet, easy to reach, and away from food and loud appliances.
Keep it consistently clean: scoop daily (twice if possible) and refresh the box on a regular schedule.
Reduce bed temptation during retraining: close the bedroom door when you can’t supervise and clean all accidents with an enzyme cleaner to remove lingering odor.
With a few practical changes—and a little patience—most cats stop choosing the bed and return to the litter box. Your sheets will recover, and more importantly, your cat will feel calmer and more secure.
Want the full step-by-step plan (including health checks and anxiety triggers)?
Why Is My Cat Peeing on Bed? Causes & Proven Fixes
If you start with the litter box basics and build from there, you’ll be helping your cat feel safe, understood, and back on track—from the ground up (and off the bed).
FAQ: Litter Box Setup (When Your Cat Pees on the Bed)
Can a litter box setup problem alone make a cat pee on the bed?
Yes. If the box is too dirty, too small, hard to access, in a stressful location, or the litter texture/scent is disliked, many cats will avoid it and choose soft bedding instead. If you haven’t ruled out medical issues, do that first—but this page focuses on litter box setup and avoidance patterns.
How many litter boxes do I need—and where should I put them?
Use number of cats + 1, and spread them out so one cat can’t “control” access. In multi-level homes, put at least one box per floor. Choose quiet, low-traffic areas with easy entry/exit paths (not next to food/water).
What size should the litter box be to prevent bed accidents?
Bigger is usually better. A practical rule is a box about 1.5× your cat’s body length (nose to base of tail) so they can turn and squat comfortably. For large cats or “near-miss” accidents, a large storage tote (low-entry cutout) often works better than standard boxes.
Should I use an open or covered litter box if my cat pees on the bed?
If your cat is avoiding the box, start with open. Covered boxes can trap odors and make some cats feel cornered. If you prefer covered for mess control, try a high-sided open box first, then re-test a hood later once the habit is stable.
My cat prefers soft surfaces—how do I transition them back to the litter box?
Offer a “texture bridge.” Set up one box with a softer substrate (e.g., puppy pad in a low-entry tray or a very fine unscented litter) and keep a second box with your normal litter. Once they reliably use the softer option, gradually mix in more standard litter over 1–2 weeks.
How often should I scoop and deep-clean to stop litter box avoidance?
Scoop daily (twice if possible). Fully dump/refresh and wash the box on a predictable schedule (often weekly to biweekly, depending on litter type and number of cats). Avoid strong fragrances or ammonia-like cleaners that can make the box smell “unsafe.”
How long should I test one litter box change before trying another?
Change one variable at a time and test for 48–72 hours (longer for anxious cats). If you change litter + location + box type at once, you won’t know what worked. Track: box visits, accidents, and which box gets chosen.
Should I block bedroom access while fixing the litter box setup?
Temporarily, yes—especially while you’re testing changes. The goal is to stop the bed from becoming a “default bathroom.” Close the door when you can’t supervise or cover the bed with a less-inviting texture, then reintroduce access once box use is consistent.
What’s the best way to clean the bed so my cat doesn’t return to that spot?
Use an enzyme cleaner and follow the dwell time instructions so odor is removed completely. If any urine scent remains, the bed can stay “marked” as a bathroom location. Avoid ammonia-like cleaners that can resemble urine odor.
Can other pets or other cats cause litter box stress that leads to bed peeing?
Yes. Dogs, bullying cats, or even outdoor animal scents can make the litter area feel unsafe. Provide boxes in separate zones, consider visual barriers, and ensure at least one box has an easy escape route so no cat can be trapped or ambushed.
References
Carney, H. C., Sadek, T. P., Curtis, T. M., Halls, V., Heath, S., Hutchison, P., Mundschenk, K., & Westropp, J. L. (2014). AAFP and ISFM guidelines for diagnosing and solving house-soiling behavior in cats. Journal of Feline Medicine and Surgery, 16(7), 579–598.
Rodan, I., Sundahl, E., Carney, H., et al. (2013). AAFP and ISFM Feline Environmental Needs Guidelines. Journal of Feline Medicine and Surgery.
Cornell University College of Veterinary Medicine – Cornell Feline Health Center. Feline Behavior Problems: House Soiling.
Merck Veterinary Manual (Cat Owners). Behavior Problems in Cats (includes elimination disorders, litter box preference factors).
VCA Animal Hospitals. Cat Behavior Problems – House Soiling.
International Cat Care (iCatCare). Soiling indoors. (Cleaning frequency, multiple trays, and common causes.)